Available for the following Payroll Plan: Standard, Premium
Glossary
- What is a Journal feature?
- What happens after I connect to Xero?
- Connecting to Xero
- Importing chart of accounts
- Configuring your chart of accounts
- What if I have multiple entities?
- Importing my Xero employees
- Exporting Pay Run data
- Re export Pay Run data
- Disconnecting from Xero
- Error resolution
- Further information
What is a Journal feature?
A journal service is a feature that allows you to connect your accounting software with your payroll platform so that you can capture journal entries in your chart of accounts. If you use Xero for your accounting software and journal service, and Employment Hero for your payroll, you can simply connect Xero with your Employment Hero Payroll platform via the Journal Service integration feature.
What happens after I connect to Xero?
After connecting your Xero and EH Payroll platforms together, and setting up your chart of accounts, you can post payroll journals automatically into Xero upon finalising a Pay Run, cutting the need for manual data import/exports or CSV uploads. You will also notice that with this export feature we format the data to reflect automatically your Xero reporting layouts.
Connecting to Xero
The below premise will walk you through how you can connect your Xero accounting platform with your Employment Hero Payroll platform.
- Log into your Employment Hero Payroll platform.
- Click the Business Settings menu.
- Click the Payroll Settings submenu.
- Click the Integrations button.
- Locate the Xero logo and click the Add button.
- Click the Connect to Xero button.
- Click the Allow Access button.
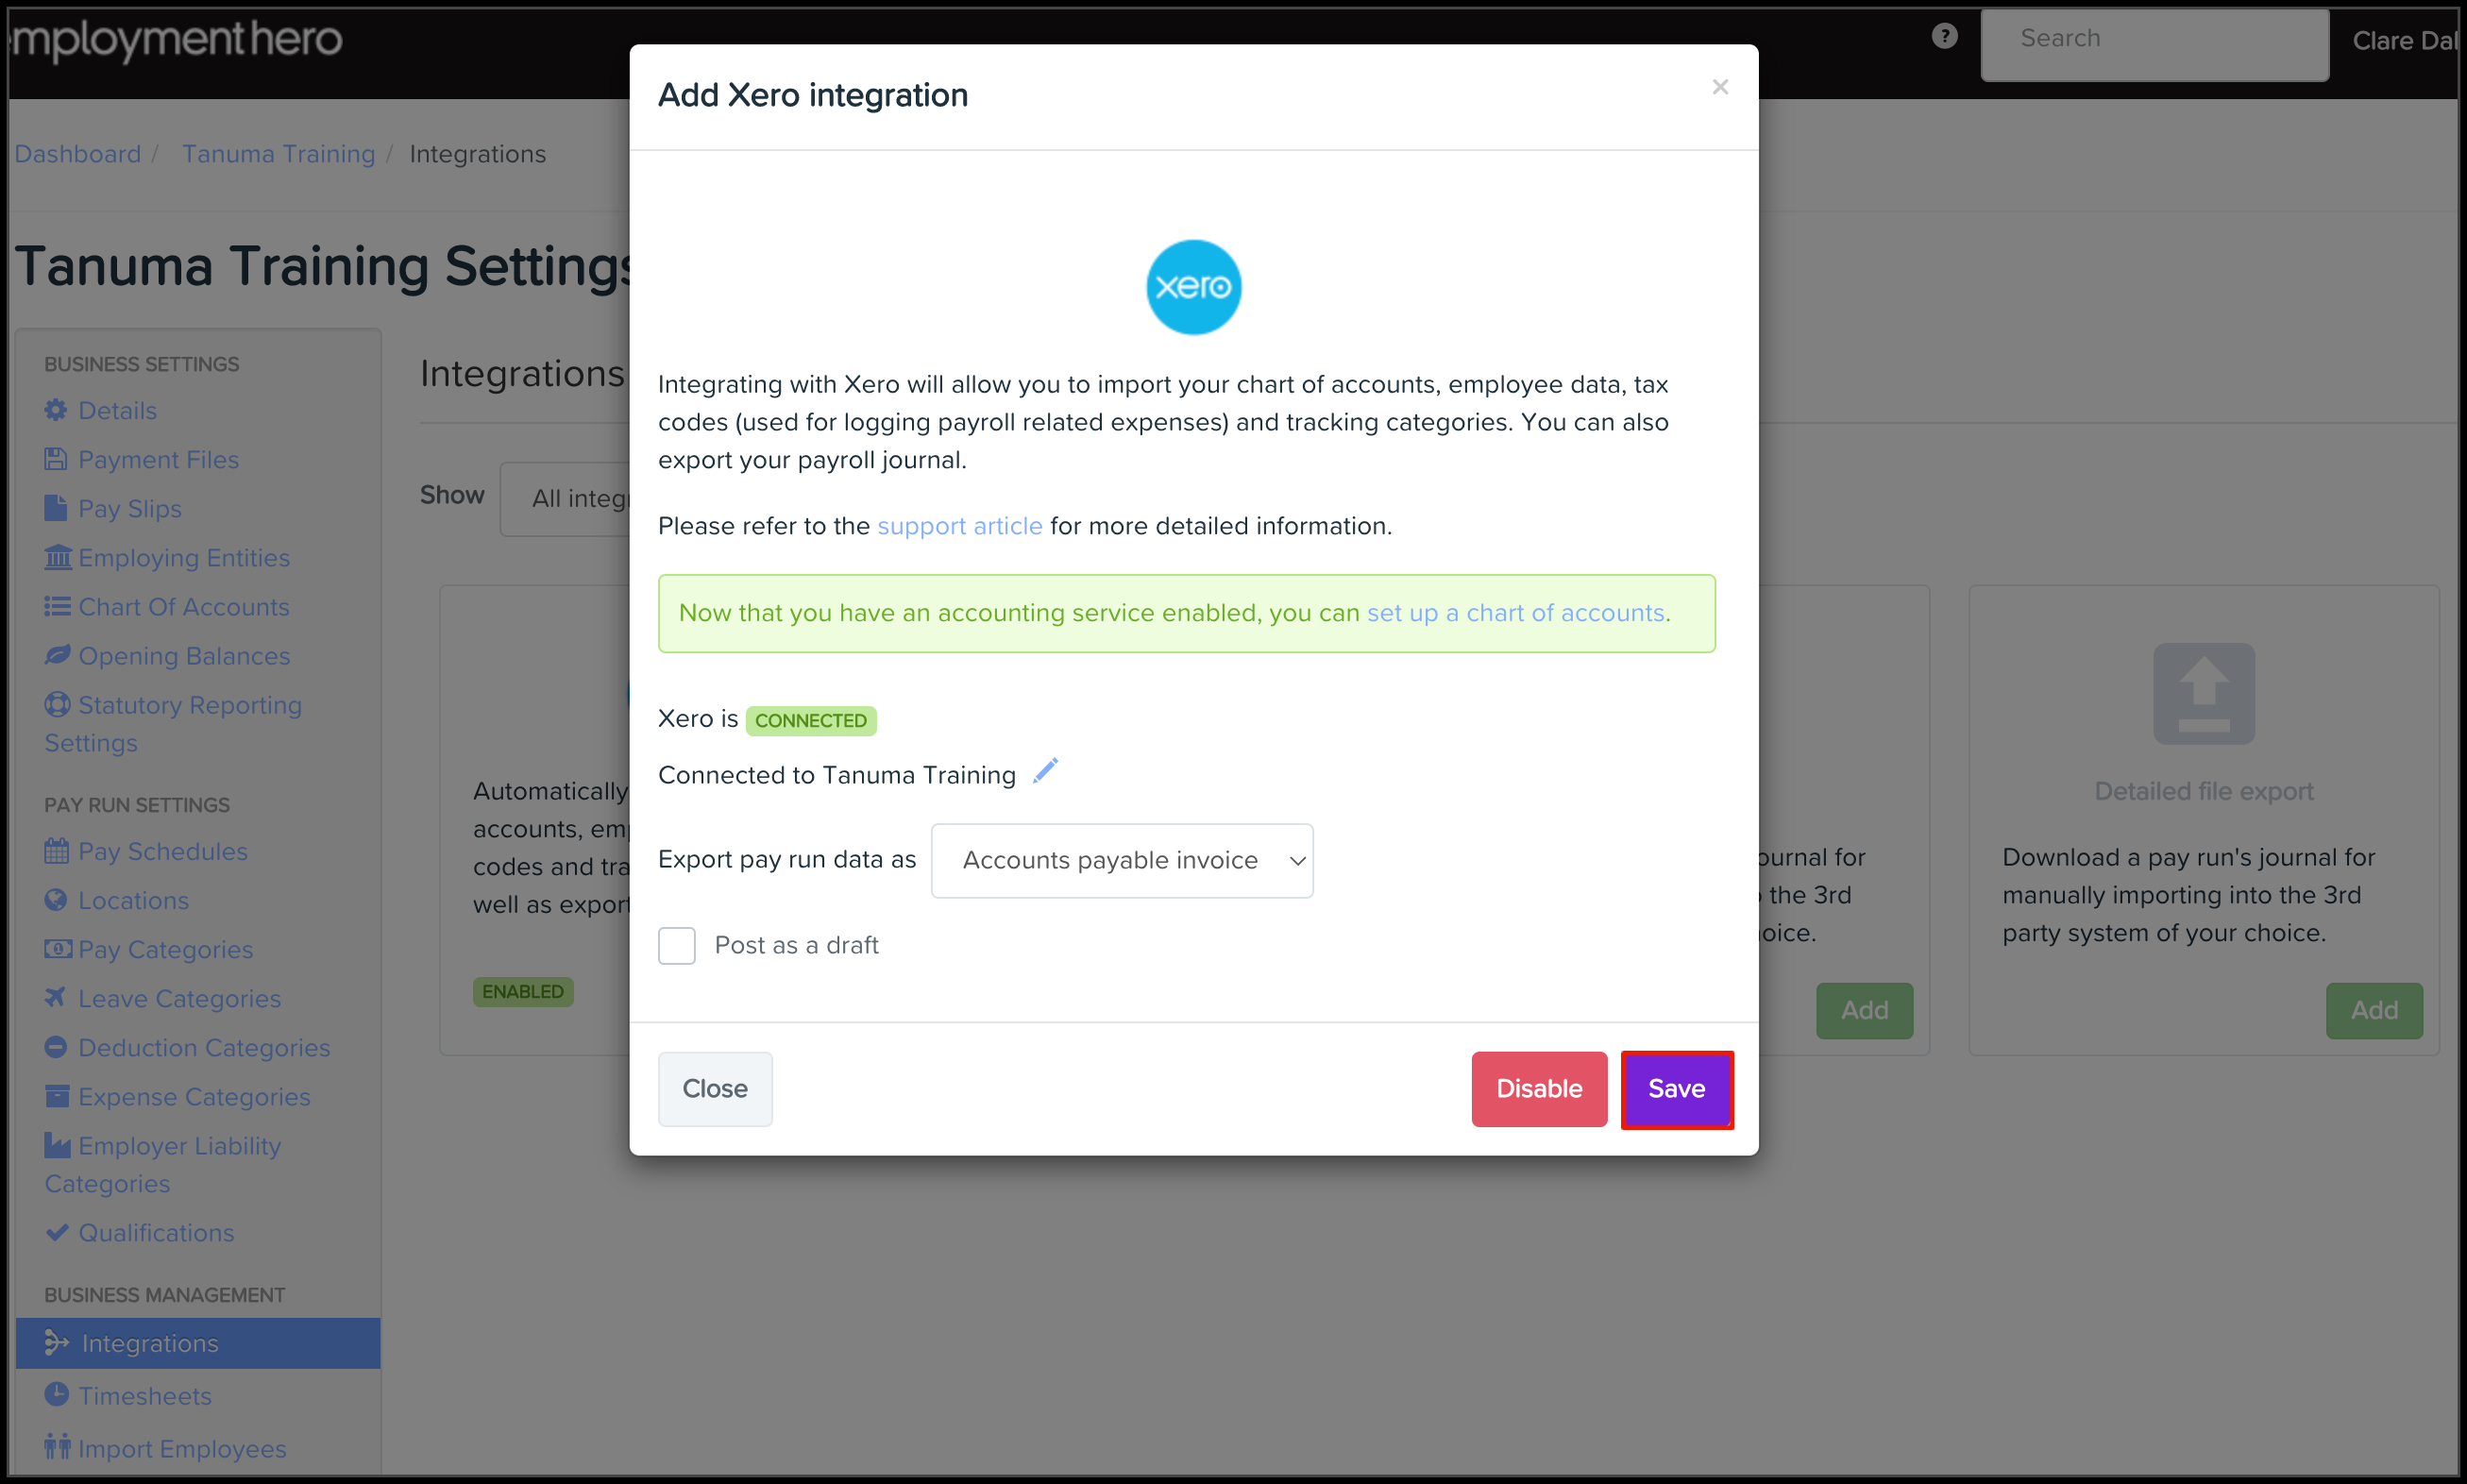
- Complete the following fields:
- Export pay run as:
- Accounts payable invoice.
- Journal.
- Post a draft.
- Export pay run as:
- Click the Save button.
Import chart of accounts
You can import your Xero chart of accounts and then map them to the various transaction types on the chart of accounts page. You can import your chart of accounts by following these steps. Once you have imported your accounts, you can map them to GL transaction types. You will also notice an Export button in the Chart of Accounts. This allows you to export the chart of accounts setup so that you can better see what you have mapped.
- Click the Business menu.
- Click the Payroll Settings sub-menu.
- Click the Chart of Accounts button.
- Click the Manage Accounts button.
- Click the Import button.
- Once on the import accounts page, you will see a list of all the accounts in your cloud accounting service chart of accounts. Tick each account that you would like to map to a payroll transaction type
- Once you have selected all your accounts, click the Save button.
Configuring your chart of accounts
Once you have imported your accounts, you can map them to GL transaction types. When you map your default GL accounts, you will notice that there is an option to Split by location. This allows you to write a transaction line per location to the journal for the same account.
This is particularly useful if you are using locations, classes, or tracking categories within Xero. Rhe Xero API does not allow us to write transactions to a bank account. As such, you have two options:
-
You can post your payroll info to Xero as a purchase invoice, much like the inbuilt Xero Payroll does now. When you do this, the purchase invoice is reconciled against the bank account transaction and as such, does not need a transaction line written to the bank account
-
You can post to Xero using a journal. If you do this, you’ll need to create a payroll clearing account that we can post to which you can then use to reconcile against the bank account.
Importing Xero employees
You can use the Employee Importing feature within the Payroll Settings module to import the employee data stored within your Xero platform. Using the Xero Payroll import feature will import the following data:
- Employee details.
- Leave Categories.
- Pay Categories.
However, it is essential to note that the import process may not always yield accurate and complete data due to varying Xero settings. Therefore, you must verify the imported information thoroughly. Pay particular attention to the following points:
- Opening Balances are not included in this import and will need to be manually entered.
- Employee leave allowances and accrual rates should be checked for accuracy.
- Tax file numbers (TFNs) may have to be added manually for imported employees.
Warning
When using any Xero integration features within the payroll platform, you need to have at least Standard + Payroll admin access on your Xero platform.
Important
If you have used an external Id before, you cannot save this data point if you have enabled the Unique External Id setting. You can read further information on this setting in the following article. The payroll platform does not import leave balances when setting up new employees.
- Log into your Employment Hero Payroll platform.
- Click the Business Settings menu.
- Click the Payroll Settings submenu.
- Select the Xero option in the Import Employees From drop-down.
- Under Do Not Import, tick the items that you do not want to import into Employment Hero Payroll:
- Pay categories
- Deduction categories
- Leave categories
- Pay schedules
Important
By default, the above items will be ticked, which means that these will not import into Employment Hero Payroll.
- Click the Import button.
- Enter your Xero login information and click the Log In button.
- Enter your 2 Factor Authentication code and click the Confirm button.
- Click the Allow Access button.
- Click the Import button.
Helpful Hint
You will now see on your screen a status message showing the successful uploading of your Xero employee data into your payroll platform.
One critical aspect to be mindful of when importing employees from Xero is the potential discrepancies in Leave and Pay Categories. Any categories imported from Xero will be 'Blank' and so might not align with Employment Hero's compliance standards, particularly concerning the STP Phase 2 regulations.
To avoid issues such as incorrect data being sent to the tax office, we strongly recommend taking the following steps:
- Assign Employment Hero Native Pay Categories and Leave Accruals: Before proceeding, assign the appropriate Employment Hero native categories to employees.
- Delete Imported Categories from Xero: After assigning the correct categories, delete any categories that were imported from Xero to prevent them from being mistakenly used. Categories Imported from Xero will include a long External ID.
Failing to follow these steps could result in issues with tax reporting and employee payment processing. For instance, pay categories imported from Xero might be blank from a tax reporting perspective, defaulting to wages.
What if I have multiple entities?
If your business has multiple employing entities, you can only link one employing entity to your Xero accounting platform. You will need to setup the remaining employing entities as a manual file upload to sync this data to your Xero accounting platform.
Exporting Pay Run data
You can use the Export to Xero feature to transfer the finalised pay run data over to your Xero accounting platform.
- Log into your Employment Hero Payroll platform.
- Click the Pay Run menu.
- Click the finalised pay run that needs exporting to Xero.
- Click the Actions tab.
- Click the Export to Xero button.
Re-export Pay Run data
You can use the Re-export to Xero feature to transfer the finalised Pay Run data over to your Xero accounting platform.
- Log into your Employment Hero Payroll platform.
- Click the Pay Run menu.
- Click the finalised Pay Run that needs re-exporting to Xero.

- Click the Actions tab.
- Click the Re-export to Xero button.

Disconnecting from Xero
The below premise will walk you through how to disable your Xero accounting integration.
- Log into your Employment Hero Payroll platform.
- Click the Business Settings menu.
- Click the Payroll Settings submenu.
- Click the Integrations button.
- Locate the Xero logo and click the button.
- Click the Disable button. The integration is then disabled.
Error resolution
Your Xero account is already linked to a payroll and therefore is not available to select
If you receive this error message, then you need to within Xero, go to Settings Connected apps for Business Name here, and then disconnect the related app currently connected to the business.
Further information
The Xero API does not allow us to write transactions to a bank account. You have two options:
- You can post your payroll info to Xero as a purchase invoice, much like the inbuilt Xero payroll does now. When you do this, we reconcile the purchase invoice against the bank account transaction and does not need a transaction line written to the bank account.
- You can post to Xero using a journal. If you do this, you will need to create a payroll clearing account that we can post to which you can then use to reconcile against the bank account.
Explore related content
- How do I map GL (General Ledger) accounts via the payroll platform Once you have imported your Xero accounts, you can map them to GL transaction types.
- Setting up the Chart of Accounts (CoA) and payroll journal service | Hero Academy Training This is a video format for the above-covered chart of accounts content.